Overview
There was a time when teaming network interfaces was done using software supplied by the NIC’s manufacturer. And if you were administering Mircosoft servers back then, you probably remember how truly awful some of the drivers and teaming software was.
With the release of Windows Server 2012, Microsoft has finally made this a native feature of the operating system. NIC teaming could not be more simple and reliable in the Microsoft server environment.
Teaming Modes
There are several different modes that can be used for the team. Understand the differences between each mode, as some may require advanced network hardware.
Static Teaming
Static teaming allows you to aggregate multiple interfaces into a single connection to provide simple fault tolerance or increased bandwidth. With this mode, you can create a 40Gb team by combining four 10Gb NICs. Each connection to the team, however, is limited to the speed of the NIC it connects to in the team. To reach the 40Gb maximum of the team, you would need at minimum four 10Gb client connections to the server.
Switch Independent
This mode can be used on any network. Unlike static teaming and LACP, you do not require a server class network switch. And unlike Static Teaming and LACP, each interface can connect to a different switch.
LACP
Link Aggregation Control Protocol, more formally known as 802.3ad, is a more advanced method of static teaming. LACP requires configuration on the switch the server is connected to. Each switch port the server’s NICs are connected to must be trunked (Ether Channeled) to create the aggregate connection. Like static teaming, each connection is limited to the speed of the NIC it connects to in the team.
Load Balancing Mode
This affects how your team balances traffic across each NIC. For the most part, unless you are running a Hyper-V server, Address Hash is what you will use.
Address Hash
Each packet is hashed, using the TCP port and IP addresses as a seed, to ensure returning packets from a client are recieved by a single team interface. This is what allows you to balance multiple network connections across your team’s interfaces to acheive the team’s total bandwidth.
Hyper-V Port
This mode is only used by Hyper-V servers. It distributes packets from virtual machines across all network interfaces by affinitizing each network port to a single team member interface.
Standby Adapter
This option allows you to define whether traffic is spread across all adapters in a team or to set one as standby. This is how we create fault tolerance for the team. When one network adapter fails, the standby then takes over for it.
Hardware Requirements
The advantage of using Microsoft’s builtin teaming software is that any NIC can be add to a team. With third-party or vendor supplied teaming software, you are locked into a single vendor and model.
It would be use to continue using the same NIC make and model and driver version in your team. This simply elimates difficult to troubleshoot problems down the road in a production environment. Identifying the problematic interface or driver would be a very daunting task to perform.
Creating a Team
NIC Teaming Console
- Launch the Server Manager console.
- Click Local Server on the left sidebar of the console.
- Look for Teaming under Properties and click the status link, which will either be disabled or enabled. By default it will be disabled. This will launch the NIC Teaming console.

NIC Teaming console in Windows Server 2012 R2 - To create a new team, click the Tasks drop-down in the Teams section of the console.
- From the Tasks drop-down, select New Team. A New Team dialog box will appear.
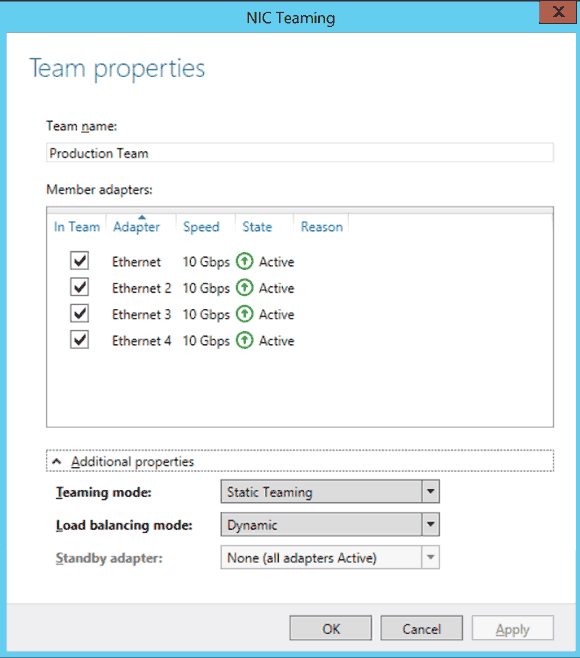
New NIC Team dialog box in Windows Server 2012 R2 - Populate the Team Name text field to name your team.
- Under the Member Adapters, select each adapter to be used in the team.
- Click Additional Properties to configure the different modes for the team.
- Set the Teaming Mode.
- Set the Load Balancing Mode.
- Set the Standby Adapter (if it is supported by the selected teaming mode).
- Click OK when done.
- Your team will now be configured by Windows. This may take a few seconds or minutes. While it is configuring, you may see most of the adapters listed as down.
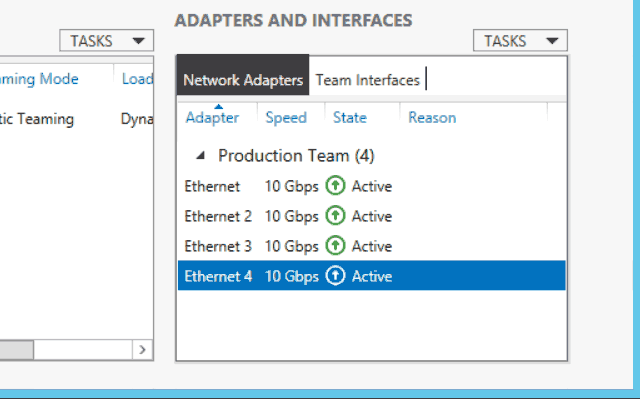
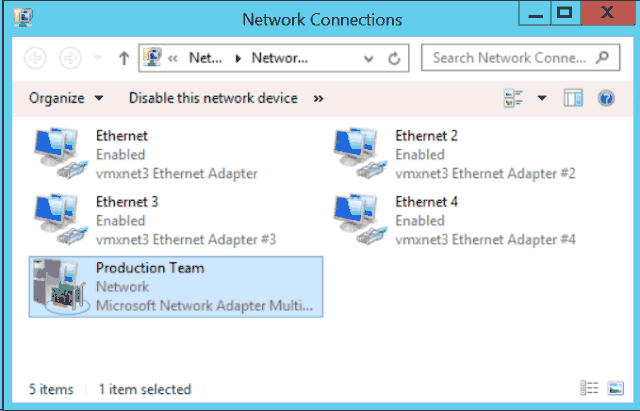
NIC teaming adapter status in Windows Server 2012 R2 - Open a Network Connections window to view the new team. It will have a very different icon than the physical adapters.
NIC team network interface in Windows Server 2012 R2 - Right-click the team and select Status to verify the interface is configured properly.
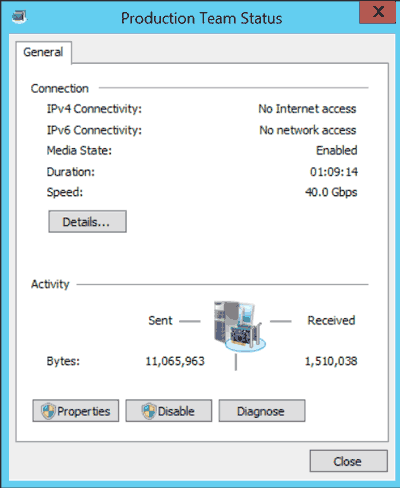
NIC team status dialog box in Windows Server 2012 R2
Summary
Microsoft’s NIC teaming feature works very well and can safely be used in production. It is one feature that most administrators will agree was a much needed addition to the server operating system. No longer do you need to spend hours or days scouring vendors’ websites to find the lasted teaming software for your network hardware.
In my own environment I found configuring and managing the network teams a breeze. Everything just worked and the configurating screens are intiative enough for most to understand.