Overview
Kubernetes’ popularity has accelerated in the last few years. Digital migrations from small organizations to large, financial institutions are pursuing it a more efficient solution to virtualization and Pivotal’s Cloud Foundry. In this post, you will be shown how you can learn Kubernetes with Minikube on OSX.
Minikube is one of the most popular choices of running Kubernetes locally on Linux, OSX, and Windows, and it an excellent learning or development tool.
Getting Started
In order to run Minikube on your Mac you will need a few prerequisites. Install the following to continue with this tutorial.
What is Minikube
Minikube is a Kubernetes cluster that runs as a single VirtualBox server. For those who want to get their hands dirty, quickly, it is one of the most recommended set ups.
It is nearly a fully-featured release of Kubernetes that allows developers to quickly gain the experience they need. It is also an excellent development environment, saving you the expense of running a hosted service on DigitalOcean, GKE, or EKS.
All of the features required for running your applications are included, such as pods, services, ingress controllers, deployments, config maps, and services.
The only thing that separates Minikube from a full installations of Kubernetes is the networking layer. However, the complexity of configuring networking configurations and policies is more for engineers who want to understand the orchestrators under belly.
After diving into Minikube, if you feel adventurous enough to deploy your own full cluster of Kubernetes, we’ve prepared a tutorial for deploying a cluster on Ubuntu 18.04.
Installing Brew
Brew is an excellent package manager for OSX. Nearly any tool used by developers and DevOps professionals can be found in its repository, and it is why it is highly recommended in many tutorials.
To install Brew on OSX, a ruby installation script is downloaded from Homebrew’s official Git repository and executed. Ruby is obviously required to complete this task, however, it is included by default on most modern OSX installations.
/usr/bin/ruby -e "$(curl -fsSL https://raw.githubusercontent.com/Homebrew/install/master/install)"
Installing Kubectl
Nearly all aspecs of Kubernetes is managed using the kubectl command. The tool is available in Homebrew’s repository under the name kubernetes-cli, and it is how kubectl will be installed in this tutorial.
brew install kubernetes-cli
To verify the installation succeeded and the version of kubectl installed, run the following command.
kubectl version
Installing Minikube
The simplest method of installing Minikube on OSX is by using Brew. This the solution recommend in Kubernete’s official documentation for Minikube.
brew cask install minikube
Running Your First Kubernetes Cluster with Minikube
All of the heavy lifting of building a cluster and managing it can be done using the minikube command, installed with Minikube.
Starting a Cluster
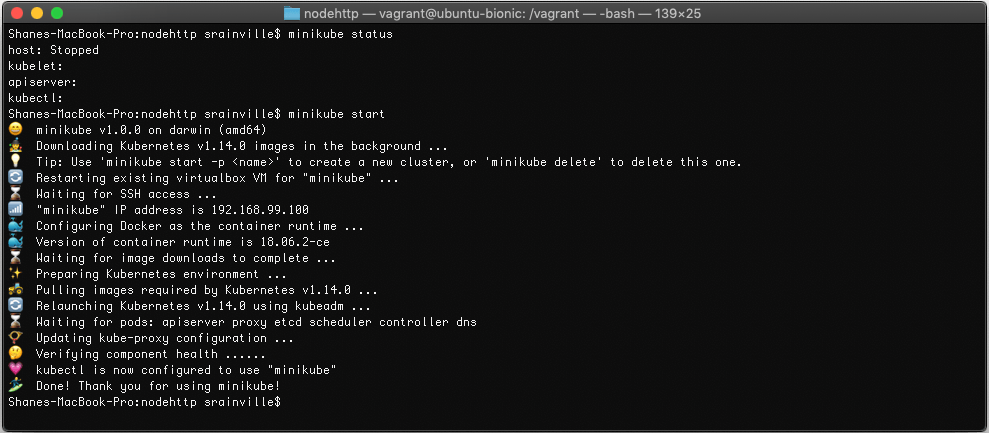
Starting a cluster is as simple as running the minikube start command. If a cluster doesn’t already exist, it will be created.
minikube start
Minikube will go through a number of steps in order to start a Kubernetes cluster. The following is an example of the output when a new cluster is created.
Stopping a Cluster
Stopping a cluster is as simple as starting one, which is done using the minikube stop command.
minikube stop
Viewing Cluster Status
Verifying the cluster status, to ensure it is either running or stopped, can be done using the minikube status command.
minikube status
The output of the command will look similar to the following example
host: Running
kubelet: Running
apiserver: Running
kubectl: Correctly Configured: pointing to minikube-vm at 192.168.99.100
Deleting a Cluster
When you are done using your cluster, the minikube delete command is used to delete it. This command is also helpful when removing a corrupted cluster, which would require you to re-create a new cluster.
minikube delete
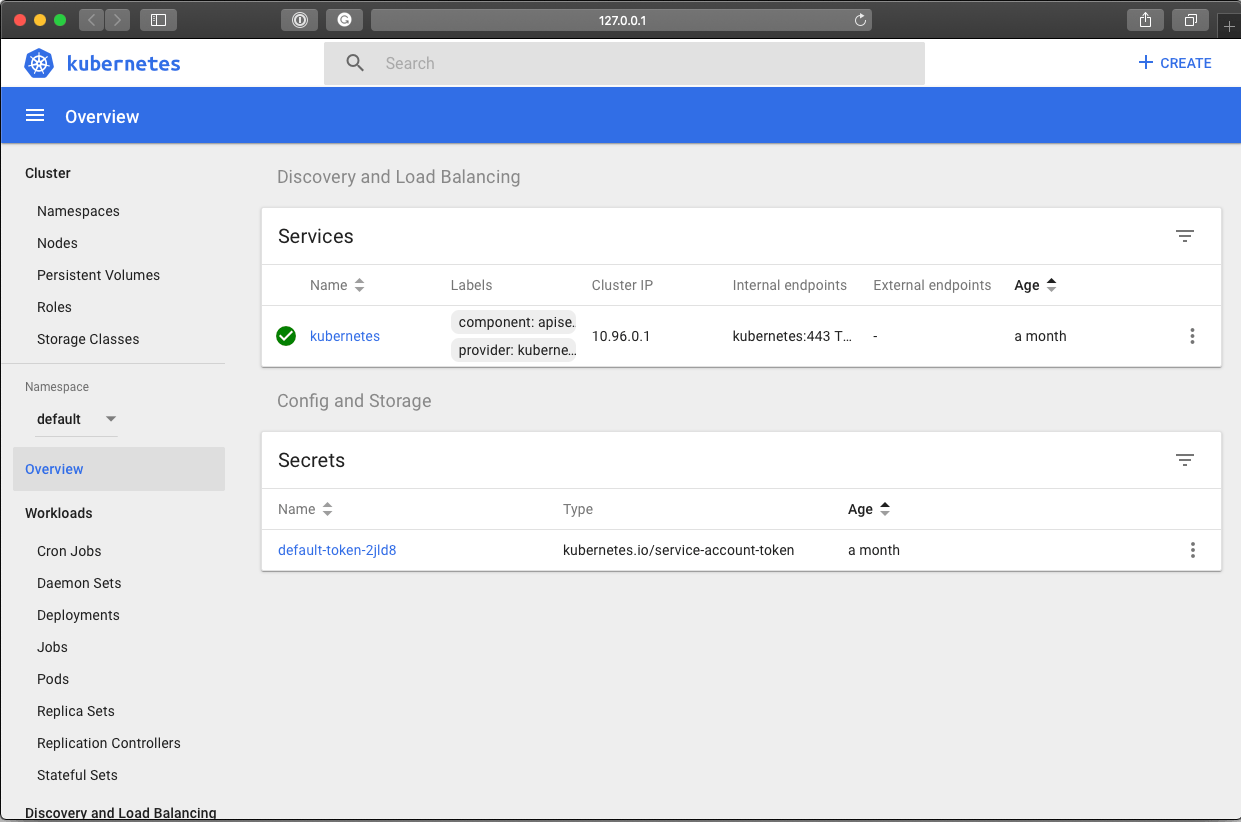
Launching Kubernetes Dashboard
While all of the information regarding you cluster can be view using the kubectl command, sometimes having a graphical view of your cluster, its pods, and other resources is helpful.
Minikube can launch a Kubernetes dashboard using the minikube dashboard command.
A pod running the Kubernetes dashboard will start, and a new Internet browser window will open to its URL.
Launching a Pod
It is finally time to launch your first Pod, now that your cluster is running. For demonstration purposes a simple NGINX pod will be deployed, along with a service resource.
For those who wish to use more advanced setups, the following tutorials are available for NodeJS and WordPress.
- Deploying NodeJS Applications in Kubernetes
- Deploying WordPress to Kubernetes
- Deploying WordPress and MySQL 5.7 to a Kubernetes Cluster
Deploying a Pod
Create a new file named nginx-pod.yml, and then open it in your favourite IDE or text editor.
touch nginx.-pod.yml
Add the following contents to it.
apiVersion: v1
Kind: Pod
metadata:
  name: nginx
  labels:
    name: nginx
spec:
  containers:
  - name: nginx
    image: nginx
    ports:
    - containerPort: 80
Save your changes, and then run the following kubectl command to create the resource in Kubernetes.
kubectl apply -f nginx-pod.yml
The apply command will create a new pod based on the specs provided. If a pod already exists matching the specs, the pod will be updated.
We can verify the pod is running and health using the kubectl get pods command.
kubectl get pods
Exposing the Pod as a Service
A pod on its own isn’t very useful. They exist as ephemeral resources, which means they aren’t expected to last long. In theory, the are cattle that can be put down at anytime, for any reason. Any data stored in them, by default is lost.
Obviously, an ephemeral application isn’t very useful, which is why service resources exist. A service is a static endpoint that forwards traffic to pods. A service attaches to pods using labels, so any pod that matches the label selector of a service will be served.
Create a new file named nginx-service.yml.
touch nginx-service.yml
Open it up inside of your favorite text editor or IDE, and add the following content to it.
apiVersion: v1
kind: Service
metadata:
  name: nginx-service
  labels:
    app: nginx
spec:
  selector:
    app: nginx
  ports:
  - port: 80
    protocol: TCP
    name: http
Save your changes, and the create the new service resource using the kubectl apply command.
kubectl apply -f nginx-service.yml
Congratulations! You’ve just deployed your first application and service into Kubernetes.