Overview
It’s one of the most high performance web servers available today, and it won’t steal all of your system resources for kicks. Although earlier version of Nginx were primarily suited to serving up static content (css, jpgs, gifs, html, js), because it could not handle processing dynamic pages well, more recent version this has all changed. You’re likely to see an increase in web applications running off of pure Nginx deployments.
This tutorial will walk you through deploying what is called a LEMP server (Linux, Nginx, MySQL, PHP) on Ubuntu 13 based servers. I will only cover the basics for now, but it will be enough to prepare the server for WordPress, for example.
Lab Configuration
For this tutorial, I will only be using a single server with the following configuration. The sizing for a small application, so make sure you add sufficient resources for a production server that fits your expected traffic profile.
| Hostname | OS | Processors | RAM | IP Address |
|---|---|---|---|---|
| websrv01 | Ubuntu 13.10 | 2 | 1 GB | 172.30.0.40 |
Install Packages
The first thing we need to do is install all of the required packages. For this tutorial, we will be installing MySQL, Nginx, PHP5’s FPM and MySQL packages.
- Install MySQL
sudo apt-get install mysql-server mysql-client
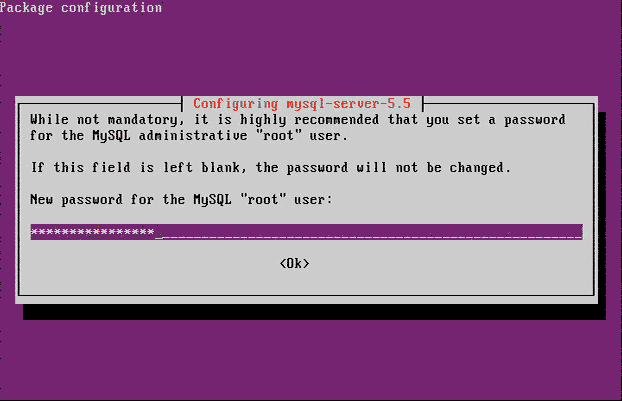
- When prompted, set Mysql’s root password.
- Install Nginx from repository
sudo apt-get install nginx
- Install PHP
sudo apt-get install php5-fpm php5-mysql
Configure Nginx
- Open the Nginx Default site configuration file into a text editor.
sudo vi /etc/nginx/sites-enabled/default
- Find the following line
index index.html index.htm;
- And add index.php to it.
index index.html index.htm index.php;
- Enable PHP processing by finding the following lines:
#location ~ .php$ {
        #       fastcgi_split_path_info ^(.+.php)(/.+)$;
        #       # NOTE: You should have "cgi.fix_pathinfo = 0;" in php.ini
        #
        #       # With php5-cgi alone:
        #       fastcgi_pass 127.0.0.1:9000;
        #       # With php5-fpm:
        #       fastcgi_pass unix:/var/run/php5-fpm.sock;
        #       fastcgi_index index.php;
        #       include fastcgi_params;
        #}
And modify them to look like this
location ~ .php$ { try_files $uri =404; fastcgi_split_path_info ^(.+.php)(/.+)$; # # NOTE: You should have "cgi.fix_pathinfo = 0;" in php.ini # # # With php5-cgi alone: # fastcgi_pass 127.0.0.1:9000; # # With php5-fpm: fastcgi_pass unix:/var/run/php5-fpm.sock; fastcgi_index index.php; include fastcgi_params; } - Save changes and exit the text editor.
- Reload the default site’s configuration file to apply the changes.
sudo service nginx reload
Configure MySQL
- Run the secure installation script.
sudo mysql_secure_installation
- When prompted, enter the Root password you set during the installation.
- When prompted, type ‘N’ to not change Root’s password.
- Accept all defaults to remove anonymous users, disallow remote root login, and remove the test database.
Test PHP on Nginx
- Navigate to the default website’s root directory.
cd /usr/share/nginx/html/
- Delete the index.html file.
rm index.html
- Create a file called index.php.
vi index.php
- Add the following to the file.
<?php phpinfo(); ?> - Save the file and exit the editor.
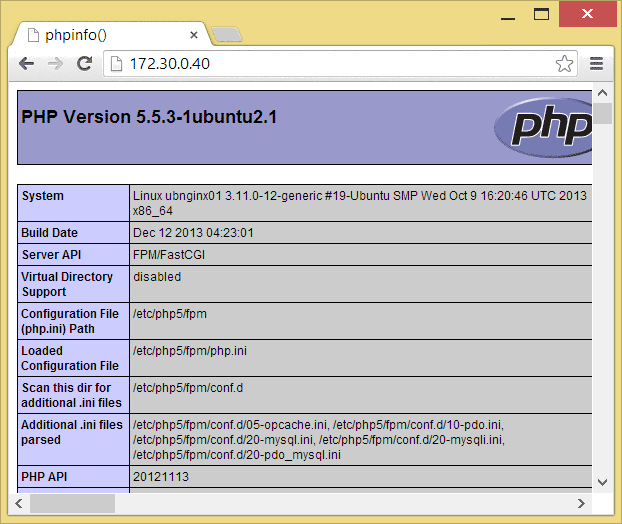
- Open a web browser on your desktop and navigate to your web server.
- If all is well, you should see the following in your web browser.
Conclusion
The web server is now ready to serve dynamic content. Download WordPress’ latest release as a test to ensure everything works as expected.
Keep in mind security and performance optimizations weren’t done. If this server is expected to run publicly run production applications, it’s recommended you research how to harden it. I’ll cover that in a future tutorial, but for now it remains out of scope of this one.
For information on how to set firewall policies for this web server, see IPTables Policies for Ubuntu 13 Web Servers.
If you have any questions, suggestions or feel I’ve missed something important, make sure you leave a comment below.


