Overview
Read-only domain controllers are ideal in remote location where system security cannot be guarenteed. They allow the remote site to have local authentication point, without storing vulnerable data about every object in the domain. The only information stored on a read-only domain controller is that of users and computers it has been authorized to authenticate. Any other object that is queried or authorized against is forwarded by the read-only DC to wrtiable domain controller.
A newly deployed RODC will not authenticate users or computers. It will forward all authentication and access requests to writable domain controller. We must specific which users, groups, or computers the RODC will cache credentials for in order for authentication and access rights to be done by it.
This step-by-step will guide you through deploying a read-only domain controller in your environment.
Goals
- Deploy a read-only domain controller in an existing domain.
- Configure user and computer account caching.
Prerequisites
Before a read-only domain controller can be deployed in your environment, the following criteria must be met. Make sure your environment meets or exceeds the following requirements.
- An existing Active Directory domain.
- 2003 domain and forest function level, or higher.
- At least one writable domain controller that is running Windows Server 2008 or higher.
- One Windows Server 2012 R2 server for the RODC role.
Server Configuration
The Active Directory domain used in the lab for this tutorial has the following servers. The last one, CALDC01, is what will be configured as a read-only domain controller.
| Hostname | Site | Role |
|---|---|---|
| TORDC01 | Toronto, Ontario | Domain Controller |
| TORDC02 | Toronto, Ontario | Domain Controller |
| CALDC01 | Calgary, Alberta | Read-only Domain Controller (RODC) |
Site Configuration
The lab used for this tutorial had the following site configuration in Active Directory.
| Site Name | Subnets |
|---|---|
| Toronto | 172.30.0.0/24 |
| Calgary | 172.30.1.0/24 |
Preparing an Upgraded Forest\Domain for RODC
If your forest or domain had its domain controllers upgraded from Windows Server 2003, you may have to extend your schema to allow read-only domain controllers. The reason for this is that Windows Server 2003 and Server 2003 R2 did not support read-only domain controllers. The role became available again in Windows Server 2008. You can skip this section if your forest was created on Server 2008 or Server 2012.
You may will know that your domain was not prepared for RODC when you attempt to promote a domain controller as on. A message will be displayed, seen in the fig1, stating that the default accounts used by RODC cannot be found.

- Mount a Windows Server 2012 R2 ISO or disc in the domain controller running a 64-bit version of Windows Server. The server should ideally be hosting the schema FSMO role.
- Execute the following command, replacing D:\ with the drive letter of the mounted image.
D:\support\adprep\adprep /rodcprep
- Follow the onscreen instructions and then wait for schema changes to be replicated to all domain controllers in the domain. Depending on the number of sites and size of your domain, this may take a while.
Preparing the RODC
The following steps will install the Active Directory role and promote the server to be a domain controller. The steps are very similar to promoting a full, writable domain controller.
- Launch Server Manager.
- Click the Manage link at the top-right of the Server Manager console.
- On the Before you begin screen, click Next.
- On the Select installation type screen, ensure Role-based or feature-based installation is selected, and then click Next.
- On the Select destination server screen, click Next.
- On the Select server roles screen, select Active Directory Domain Services, and then click Next.
- If Add Roles and Features Wizard dialog box appears, click Add Features.
- On the Select features screen, click Next.
- On the Active Directory Domain Services screen, Click Next.
- On the Confirmation screen, ensure Restart the destination server automatically if required is checked, and then click Install.
- When the installation completes, click Promote this server to a domain controller.
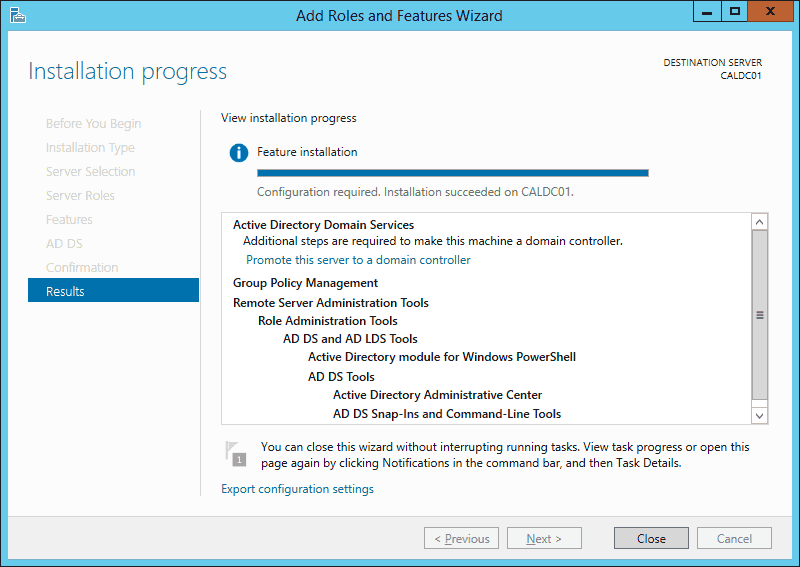
FIG2 – Promote server to domain controller
Promoting Server to Domain Controller
- On the Deployment Configuration screen, ensure Add a domain controller to an existing domain is selected, enter the fully qualified domain name in the Domain text field, and add credentials for an administrator of the domain.
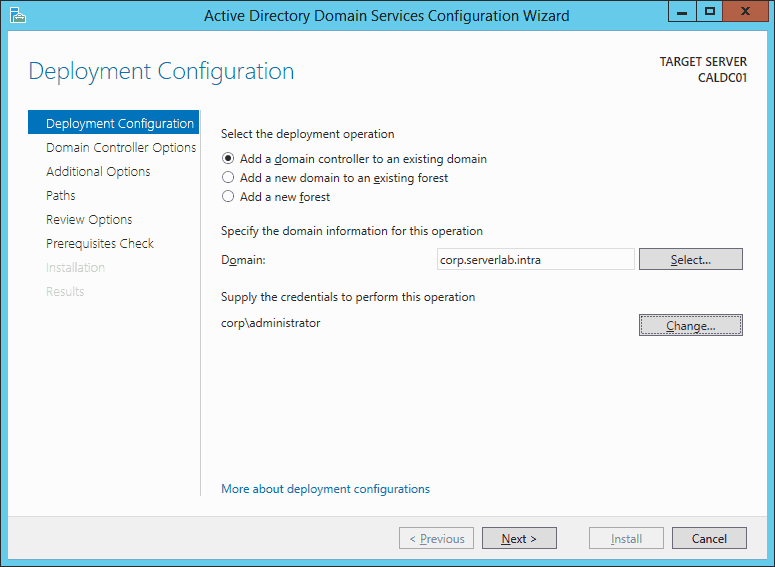
FIG3 – Deployment configuration screen - On the Domain Controller options screen, ensure Read only domain controller (RODC) is checked, select the site for the server by using the Site name drop-down, and set the DSRM password. When done, click Next.

FIG4 – Domain Controller Options screen As can be seen in the FIG4, we are also installing the DNS role onto our RODC. When a DNS role is installed on a RODC, the DNS role also becomes read only. All DNS record registration requests submitted to this server will be forwarded to a full domain controller.
- On the RODC Options screen, we can configure which accounts or groups are allowed to have their passwords replicated to the RODC. By default, a RODC replicates passwords of any account in the Allowed RODC Password Replication Group. This may be too global for our liking, so I’ve created a security group just for the Calgary users. The next step would be to remove the default Allowed RODC Password Replication group. Click Next when done.

FIG5 – RODC options screen It’s important to remember that a read only domain controller will only cache credentials for accounts added to the security groups listed under Accounts that are allowed to replicate passwords to the RODC. IF you do not add accounts of the computers and users for this site, their passwords will not be stored on the RODC and they will not be able to log onto any computer or resources if the link between this site and a site with a writable domain controller goes down.
- On the Additional Options screen, you may select which domain controller to replicate from or let that be decided automatically. Click Next when done.
- On the Paths screen, you may select locations for the Active Directory database, log files, and SYSLOG files. A best practice is to move them onto a separate volume. When done, click Next.
- On the Review Options screen, review your settings and then click Next.
- On the Prerequisites Check screen, review the results and then click Install.
- After the installation and replication of Active Directory objects completes, the server will reboot.