Overview
For a long time Apache was the primary web server powering web sites on Linux servers. A relatively new contender, Nginx, has become a very popular alternative and for good reason. Although this tutorial will focus on deploying it on Ubuntu 13 servers, Canonical has announced that Nginx will be primary web server package for Ubuntu 14.
Server Configuration
Hardware Details
Aside from security, this is one of the most important steps. You need to ensure that the hardware configuration will be able to handle the expected load of your WordPress site. We’re through everything onto one server, in what is called a LEMP setup (Linux, Nginx, MySQL, and PHP), and we don’t expect more than a few thousand visitors per month. or so.
| Hostname | OS | Processors | RAM | Storage | IP |
|---|---|---|---|---|---|
| WPDEV01 | Ubuntu Server 13.10 | 4 | 1 GB | 48 GB | 172.30.0.45 |
The actual sizing will depend greatly on your application’s requirements and where your web server is hosted. If you’d like to follow along, you can by deploying a virtual server in VirtualBox, for example.
Software Configuration
The WordPress website will be powered by the following software.
| Web Server | Nginx | Database Server | MySQL |
|---|---|---|---|
| Script Language | PHP | Application | WordPress |
Planning the file system
One of the most important steps in planning your application server is designing a file system and partition scheme. A proper design can go a long way for performance, reliability and security. A default partition scheme may be easy, but your placing your server in great risk by using it; therefore, it should never be done on a production server. The following are just guidelines to prime you for your own environment. Our ability to sufficiently carve out different file systems for our lab server is limited by the small amount of storage available. The following table details which directories should be placed on their own separate file systems and why.
| /var | The /var directory in Linux contains variable data which may change frequently during the server operation, like log files. This directory has a nasty habit of monopolizing a file system’s free space, which will result in down time if its left on the / (root) partition. |
|---|---|
| /home | Aside from increased security benefits, separating this partition makes upgrading or migrating to a new operating system easier. It also prevents a single user from consuming the / (root) partitions entire free space, which will bring the server down. |
| /srv/webapps | The default root document location used by Nginx on Ubuntu is /usr/share/nginx/html. You can easily carve this off instead; however, using your own structure is ideal when you expect to host more than one web application on your server. |
Storage Mount Points
| MBR – Standard Partitions | |||
|---|---|---|---|
| /boot | EXT2 | 200 MB | The boot image is small and it doesn’t need the overhead added by EXT4’s journaling. Other than minimizing the complexity of the file system used by /boot, there are very few benefits for placing it on its own partition with a large majority of today’s Linux distros. |
| LVM – Logical Volumes | |||
| / | EXT4 | 10 GB | |
| /home | EXT4 | 1 GB | |
| /var | EXT4 | 4 GB | The log volume should be large enough to keep logs in you intend to keep for a certain period of time, for troubleshooting, legal hold, etc. However, for really long retention perionds, your logs should be shipped to a central logging server. |
| /srv/webapps/ | EXT4 | 31 GB | This is a comfortable size for a web application, like a WordPress site with some locally hosted multimedia. |
Secure the Mount Points
The reason we separate certain paths into their own mount points is to be able to protect them from certain activity. We want to block users from running malicious or unauthorized executables from our /webapps file system, for example.
- Open fstab into a text editor, like VI, for example.
sudo vi /etc/fstab
- Following along with the disk layout above, find the following lines in fstab and add the highlighted options.
/dev/mapper/vg_webapp001-lv_home    /home     ext4    defaults,nosuid,nodev,noexec   1 2
/dev/mapper/vg_webapp001-lv_log     /var/log  ext4    defaults,nosuid,nodev   1 2
/dev/mapper/vg_webapp001-lv_srv /srv/webapps  ext4    defaults,nodev,noexec   1 2
nodev Prevents device files from existing on the mount point’s file system. Unless you have some special requirements, device files should only exist in /dev. noexec Prevents executable files from running on the mount points file system. In this tutorial, we have it set for our webapp mount. If your web application requires cgi, this will break the application and you should not add it. - Save the modified fstab file and exit the text editer.
- Reboot the server or unmount and then remount the modified mount points to apply the changes.
Creating Users and Groups
After the deployment is complete, no one should use the Root account unless absolutely required. We need to create two user accounts and two groups, one for day-to-day maintenance of the web applications and another for system administration. After the we’ve created our users and groups, we’ll then secure SSH to only allow our non-administrative accounts remote access. This separation adds another layer of security to help prevent hackers from gaining complete control, if they were successfully in remotely logging in with someones account.
- Create your day-to-day user account.
sudo adduser jsmith
- Set your password for this account.
sudo passwd jsmith
- Create your server admin account.
sudo adduser jsmith-admin
- Set your admin account’s password
sudo passwd jsmith-admin
- Create your webadmins group.
sudo groupadd webadmins
- Create your system administrator group.
sudo groupadd sysadmins
- Create a remote administration group for which we’ll grant SSH access.
sudo groupadd remoteadmins
- Add your day-to-day account to the webadmins group.
sudo usermod -G webadmins -a jsmith
- Add your server admin account the system administrator group.
sudo usermod -G sysadmins -a jsmith-admin
- Add the Nginx account to the webadmins group to grant it access to our /webapps directory, which will be needed after we secure it below.
sudo usermod -G webadmins -a www-data
- Since we want jsmith, being us, remote access into our web server, we need to add the account to the remoteadmins group.
sudo usermod -G remoateadmins -a jsmith
Install the Required Software Packages
- Install Nginx
sudo apt-get install nginx
- Install PHP5 and extensions for MySQL.
sudo apt-get install php5-fpm php5-mysql
- Install MySQL server and client
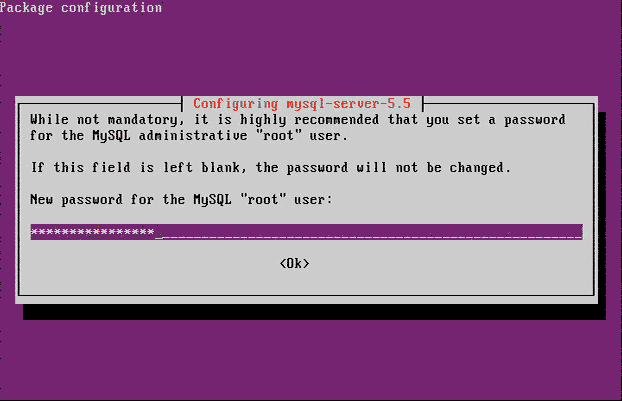
sudo apt-get install mysql-server mysql-client
- Install OpenSSH Server to allow remote connections.
sudo apt-get install openssh-server
- Install Unzip, need for unarchiving the downloaded WordPress files.
sudo apt-get install unzip
Granting System Administration Rights
We’re now going to assign accounts who need system administration rights to our sysadmins group. Through sudo, the sysadmins group will have full administrative rights. Root will then be given a very complex password to protect it from misuse.
- Open the sudoers file editor.
sudo visudo
- Navigate to the bottom of the file and add the following line:
%sysadmins ALL=(ALL) ALL
- To save our settings, press ESC and then type colon (:) and ‘w’.
- Type colon (:) and ‘q’ to exit the editor.
- Set a complex password for the Root account. The longer, more complex it is the better.
Locking Down SSH Access
SSH is a great tool for remote administration of your Linux servers; however, left unprotected using default settings it is very risky. Brute forcing into any server is a two step process: find a user account and discover the user account’s password. And what account is known to exist on every Linux server? Root. For this reason it is best practice to prevent Root from having remote access to the server. Another concern is ‘who has access rights into the server?’ By default, SSH will grant access to all accounts. Since not every user should have the ability to SSH into the server, we want to ensure only authorized users can do so. To do this, we are going to configure SSH to only allow users in the remoteadmins group permission to remotely access the server.
- Open the SSH Server configuration file into a text editor, like VI.
sudo vi /etc/ssh/sshd_config
- Find the line that permits Root logon.
#PermitRootLogin yes
Uncomment it by removing the hash mark ‘#’ and replacing ‘yes’ with ‘no’. Note: despite this option being commented out, by default SSH grants Root logon permissions. This is why it is important we uncomment the option and explicitly set it to ‘no’.
PermitRootLogin no
- Now we just want authorized users access into our server through SSH. Add the ‘AllowGroup’ option to the configuration file, and then append the groups we want to allow access to.
AllowGroups remoteadmins
- Save the configuration file and exit the editor.
- Restart the SSH daemon to apply our changes.
sudo service sshd restart
Prepare the WordPress Directory
Before we install configure Nginx and install WordPress, we need to prepare our webapps directory using the following directory tree. The webapps directory under /srv will be granted rights that allow our developer user accounts read/write access, and the public_html directory will be grant everyone read access.
/srv
   |---/webapps
         |---/app1
               |---/public_html
   |---/var
         |---/logs
               |---/webapps
                     |---/app1
- Create the web root directory
sudo mkdir -p /srv/webapps/app1/public_html
- Create the logging directory
sudo mkdir -p /var/logs/webapps/app1
- Change /webapps group ownership to our webadmins.
sudo chgrp -Rv webadmins /srv/webapps
- Set the guid bit recursively for the webapps directory to ensure all new files and directories are owned by the webadmins group. Also, we’re going to grant read/write access to the webadmins group and file owners, and no access to anyone else.
sudo chmod 2770 -Rv /srv/webapps
- With the public_html directory, we’re going to grant read access to everyone.
sudo chmod 2775 -Rv /srv/webapps/app1/public_html
Configure MySQL Server
- To remove anonymous user access and disallow Root to connect remotely, run the following command. Remember to enter ‘y’ when prompted to reload the privilege tables; otherwise, you account changes will not be applied.
sudo /usr/bin/mysql_secure_installation
- Log into MySQL’s console.
mysql -u root -p
- Create a user account for yourself.
CREATE USER 'jsmith'@'localhost' IDENTIFIED BY 'mypassword';
- Grant administrative privileges to your account.
GRANT ALL ON *.* TO 'jsmith'@'localhost' WITH GRANT OPTION;
Granting yourself all privileges can be very dangerous. Your account should only ever be used for administrative purposes. - Create a database for your web application. Our example will be for a WordPress website using a database called MyWPSite.
CREATE DATABASE app1;
- Our web application is going to need an account that allows it to query, add and delete items from our database. We’re going to name the account mywpsite_service and it assign it a fairly complex password.
CREATE USER 'app1_service'@'localhost' IDENTIFIED BY '2qrYzFrxcXctsHq66erd9NYBuwq4enbX';
- Now we’ll grant our WordPress’ service account only the privileges it actually requires.
GRANT SELECT,INSERT,UPDATE,DELETE,INDEX,CREATE ON app1.* TO 'app1_service'@'localhost';
- Rename the MySQL Root account. This will prevent most drive-by script hits and some malicious users from breaking into our database server.
RENAME USER 'root'@'localhost' TO 'new_user_name'@'localhost';
- Flush the privilege tables to force the new privileges to be applied.
FLUSH PRIVILEGES;
Configure PHP
- Open PHP’s configuration file into a text editor, like VI.
sudo vi /etc/php5/fpm/php.ini
- There are a few functions that should be disabled to security reasons, unless you know for sure that your web application requires them. Find the following line.
disable_functions =
and replace it with
disable_functions = exec,passthru,shell_exec,system,proc_open,popen,curl_exec,curl_multi_exec,parse_ini_file,show_source
- Find the line containing option display_errors and ensure it is set to ‘off’.
display_errors = Off
- Find the line containing option register_globals and ensure it is set to ‘off’.
register_globals = Off
- Find the line containing option magic_quotes_gpc and ensure it is set to ‘off’.
magic_quotes_gpc = Off
- Save your changes and exit the text editor.
- Restart Nginx to apply the new PHP settings.
sudo service nginx restart
Install and Configure WordPress
- Download the latest WordPress release into your home directory.
wget http://wordpress.org/latest.zip
- Unzip the download.
unzip latest.zip
- Copy the uncompressed files into the public_html folder of our application directory. Do not move the files. Copying is needed to ensure the appropriate permissions are inherited.
cp -R ./wordpress/* /srv/webapps/app1/public_html/
- Open a web browser on a desktop and navigate to your web server.
- Click the Create a Configuration File button to begin the installation.
- Click the Let’s go! button.
- In the database field, enter the name of the database we created for our application earlier –app1.
- Enter the service account we created for the database – app1_service
- Enter the service account’s password – 2qrYzFrxcXctsHq66erd9NYBuwq4enbX
- Use the default Database Host field value.
- Change the Table Prefix to anything but the default.
- Click Submit.
- If all went well, click Run the Install.
- Enter a name of the website in the Site Title field.
- For security reasons, change the Username value from Admin to something else.
- Enter a password for the user account.
- Enter an e-mail address.
- Click the Install WordPress button.
Secure WordPress
Whether it’s WordPress or some other web application, there are going to be areas that need to be protected from the public – a good example is any administration area. And if your website is public facing, it’s likely you forcefully want to prevent sections from being indexed by web indexers.
- Open the Nginx default website configuration file into a text editor, like VIM.
vim /etc/nginx/sites-available/default.conf
- Locate the section that defines your website. It will be contained in a server section, which starts like.
server { listen 80 default_server; listen [::]:80 default_server ipv6only=on; ... - Find the following line:
root /usr/share/nginx/html;
and modify it so that it points to the directory we created earlier
root /srv/webapps/app1/public_html
- Set index.php as an index file name by finding the following line:
index index.html index.htm;
and appending index.php to the end of it
index index.html index.htm index.php;
- Enable PHP support by locating and removing the hash tags to uncomment the highlighted lines:
# pass the PHP scripts to FastCGI server listening on 127.0.0.1:9000
#
#location ~ .php$ {
#       fastcgi_split_path_info ^(.+.php)(/.+)$;
#       # NOTE: You should have "cgi.fix_pathinfo = 0;" in php.ini
#
#       # With php5-cgi alone:
#       fastcgi_pass 127.0.0.1:9000;
#       # With php5-fpm:
#       fastcgi_pass unix:/var/run/php5-fpm.sock;
#       fastcgi_index index.php;
#       include fastcgi_params;
#}
The section should look like the following when you are done.
# pass the PHP scripts to FastCGI server listening on 127.0.0.1:9000 # location ~ .php$ { fastcgi_split_path_info ^(.+.php)(/.+)$; # # NOTE: You should have "cgi.fix_pathinfo = 0;" in php.ini # # # With php5-cgi alone: # fastcgi_pass 127.0.0.1:9000; # # With php5-fpm: fastcgi_pass unix:/var/run/php5-fpm.sock; fastcgi_index index.php; include fastcgi_params; } - To protect the WordPress administration console from unauthorized users, create the following location directive inside of the server directive, modifying the highlight network to match your own.
location /wp-admin {
    allow 192.0.2.0/24;
    deny all;
}
This will block all connections not originating from the 192.0.2.0/24 network. Modify the network address to match your environment.
- Save your changes and exit the editor.
- Reload the Nginx configuration file.
sudo service nginx reload


