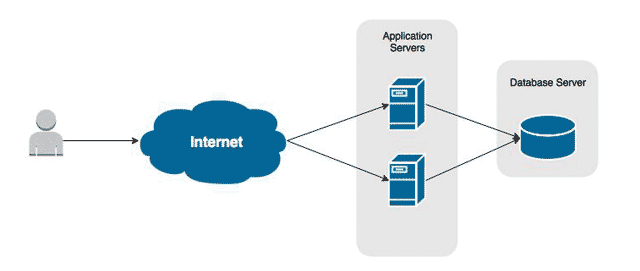
Learn how to scale your WordPress site across multiple servers using NFS. There will come a time in your blog’s life where you are either going to want high availability or increased load capacity. The challenge with WordPress is ensuring all servers hosting your site have the same content — themes, uploads, etc.
One solution to this problem is using NFS or Network File System shares to store your content. The share can be attached to every server, allowing it instant access to all new content. No need to fiddle around with rsync or custom scripts to replicate the content to every server.
The Infrastructure
The following infrastructure will be used in our tutorial. Our sizing is for demonstration only. Depending on your environment you may require more or less RAM.
| SERVER | OS | ROLE | IP | CPU | RAM |
|---|---|---|---|---|---|
| proxy-1 | Ubuntu 16.04 | NGINX Load Balancer | 10.0.5.10 | 1 | 1 GB |
| nfs-1 | Ubuntu 16.04 | Ubuntu NFS server | 10.0.5.11 | 1 | 2 GB |
| wordpress-1 | Ubuntu 16.04 | WordPress Server | 10.0.5.12 | 1 | 1 GB |
| wordpress-2 | Ubuntu 16.04 | WordPress Server | 10.0.5.13 | 1 | 1 GB |
| wordpress-3 | Ubuntu 16.04 | WordPress Server | 10.0.5.14 | 1 | 1 GB |
NGINX Load Balancing
Our solution uses an NGINX server to balance the load across three WordPress servers. You may use any load balancer of your own preference. The key is that you have a single endpoint that is able to push requests to one of your backend WordPress servers.
- SSH into the Nginx server.
- Install NGINX.
sudo apt install nginx
- Open the NGINX configuration file into a text editor, such as VI.
sudo vi /etc/nginx/nginx.conf
- Configure NGINX to reverse proxy HTTP requests to our three backend WordPress servers.Our deployed NGINX server has the following basic configuration set in /etc/nginx/nginx.conf. This may not be an ideal configuration file for your production. This one simply serves as an example of how to balance the load across our three servers.
user nginx; worker_processes 1; error_log /var/log/nginx/error.log warn; pid /var/run/nginx.pid; events { worker_connections 1024; } http { # List of servers that host WordPress upstream wordpress { server 10.0.5.12:8080; server 10.0.5.13:8080; server 10.0.5.14:8080; } server { listen 80; location / { # Pass all requests to the backend wordpress servers. proxy_pass http://wordpress; } } include /etc/nginx/mime.types; default_type application/octet-stream; log_format main '$remote_addr - $remote_user [$time_local] "$request" ' '$status $body_bytes_sent "$http_referer" ' '"$http_user_agent" "$http_x_forwarded_for"'; access_log /var/log/nginx/access.log main; sendfile on; keepalive_timeout 65; } - Save your changes and exit the text editor.
- Restart NGINX to apply our settings.
Creating an NFS Share
You will need to create an NFS share that all WordPress servers can mount. The best method would be to deploy a dedicated NFS server. In this tutorial, we will deploy an Ubuntu 16.04 server to host our NFS shares.
- Log onto your NFS server.
- Create a directory to host the shared content.
sudo mkdir -p /srv/exports/wordpress
- Install the NFS Server kernel package
sudo apt install nfs-kernel-server
- The NFS package installation will create a file called /etc/exports. Open this file in a text editor.
sudo vi /etc/exports
- Add an entry to export your shared WordPress directory. Your exports file should look similar to the following.
/srv/exports/wordpress 10.0.5.0/24(rw,sync,no_root_squash,no_subtree_check)
If you are not familiar with NFS exports, the above line exports the directory /srv/exports/wordpress to any server in the 10.0.5.0/24 subnet. It allows Read-Write access. The sync option ensures all writes are completed to disk.
- Export of new NFS share.
sudo exportfs
Mounting the NFS Share on the WordPress Servers
On each of your WordPress servers, you will need to mount the share. In our share, we created several directories — themes, plugins, uploads. We can mount each of them separately to ensure all WordPress sites use the same respective files.
We are going to make the assumption that your WordPress files are hosted in /var/www/html. If they are not, modify the instructions below so that they reference your installation directory.
- SSH into the first WordPress server.
- Open the fstab file into a text editor.
sudo vi /etc/fstab
- Add the following lines to the file. Each one mounts the different shared WordPress directories.
10.0.5.11:/srv/exports/wordpress /var/www/html nfs auto 0 0
- Save your changes and exit the text editor.
- Mount the shares.
sudo mount -a
- Download the latest WordPress release.
wget http://wordpress.org/latest.tar.gz
- Extract the contents of the WordPress tar into your NFS mounted share.
tar xvf latest.tar.gz -C /var/www/html --strip-components=1
- Perform the NFS mounting tasks (steps 1 through 5) on the remaining WordPress servers.
Test Your WordPress Site
Now that every WordPress server has the shares mounted, test that you are able to upload new content. If the upload is successful, log into every WordPress server and check the contents of your upload directory.
You should see the files that have been uploaded on every WordPress server.
There Be Dragons
Using NFS is a simple way of scaling your WordPress site across multiple servers. However, like anything, there are dangers that you should be aware of when following this example.
One major area of concern is your NFS server becomes a single point of failure. if it goes offline for any reason, your WordPress site will not be able to serve the shared content.
If your themes and plugins are stored in the share, which we have done in our example, your site will not load.
Protect yourself by making your NFS server has redundant as possible. Place your share onto a RAID volume with sufficient protection. Add multiple network interfaces for fault tolerance. Backup your NFS exports nightly.


