Overview
The distributed file system called Network File System (NFS) allows client computers to access files hosted on other computers over the network. Unlike other network file sharing protocols, such as Microsoft’s SMB, NFS shares must be mounted on the client before they can be access.
Install & Configure NFS
A base server installation of CentOS 6 includes the packages required for NFS. A minimal installation, on the other hand, does not and they will have to be installed. You can ignore this step if you did a base server installation.
- Install NFS and it’s common utilities using yum.
yum install nfs-utils - Configure the NFS service to run at boot.
chkconfig nfs on - Configure the rpcbind service to run at boot. This service is required by NFS and must be running before NFS can be started.
chkconfig rpcbind on - Start the rpcbind service.
service rpcbind start - Start the NFS service.
serice nfs start
Prepare NFS Exports
Create Directory for Export
The first step to sharing files is to create a directory that will be ‘exported’ to our client computers.
- Create a directory for our first export.
mkdir /exports/documents
Export Directory
By exporting a directory, we are allowing clients to mount it over the network.
- Open the NFS exports file into a text editor.
nano /etc/exports - To export the document directory created earlier to a specific client with readwrite access, add the following line.
/exports/documents desktop01.serverlab.intra(rw)
- To export the directory to a clients with hostnames ranging from desktop01 to desktop09 with readwrite access, add the following line.
/exports/documents desktop0[1-9].serverlab.intra(rw)
- To export the directory to all clients on a specific network with readwrite access, add the following line.
/exports/documents 172.30.1.0/24(rw)
- To export the directory to everyone with read-only access, add the following line.
/exports/documents *(rw)
- Save your changes and exit the text editor.
- Export the directory defined above.
exportfs -a
Export Options
In our examples above, we are using only a single option of either readwrite or read-only for our export. Here is a list of additional options that can be used in any combination.
| rw | Allow both read and write requests on NFS volume. |
|---|---|
| async | Do not wait for acknowledgements that data has been commited to disk. This improves performance at the cost of data integrity. |
| sync | Wait for acknowledgement that data is committed to disk. |
| root_squash | Map requests from uid/gid 0, the root account and group ID’s, to the anonymous uid/gid. This prevents root access to exports. |
| no_root_squash | Do not squash root’s privileges. |
Assign Static Ports to NFS
The default configuration for NFS is to use random ports for client connections. This isn’t desirable in environments where port counts need to be limited, for security reasons. Asking your network administrator to poke one thousand holes into the firewall isn’t going to make you very many friends. Luckily, we can configure NFS to use only specific ports that are easier to secure.
- Open the NFS network configuration file.
nano /etc/sysconfig/nfs - Uncomment the highlighted lines.
#
# Define which protocol versions mountd
# will advertise. The values are "no" or "yes"
# with yes being the default
#MOUNTD_NFS_V2="no"
#MOUNTD_NFS_V3="no"
#
#
# Path to remote quota server. See rquotad(8)
#RQUOTAD="/usr/sbin/rpc.rquotad"
# Port rquotad should listen on.
RQUOTAD_PORT=875
# Optinal options passed to rquotad
#RPCRQUOTADOPTS=""
#
#
# Optional arguments passed to in-kernel lockd
#LOCKDARG=
# TCP port rpc.lockd should listen on.
LOCKD_TCPPORT=32803
# UDP port rpc.lockd should listen on.
LOCKD_UDPPORT=32769
#
#
# Optional arguments passed to rpc.nfsd. See rpc.nfsd(8)
# Turn off v2 and v3 protocol support
#RPCNFSDARGS="-N 2 -N 3"
# Turn off v4 protocol support
#RPCNFSDARGS="-N 4"
# Number of nfs server processes to be started.
# The default is 8.
#RPCNFSDCOUNT=8
# Stop the nfsd module from being pre-loaded
#NFSD_MODULE="noload"
# Set V4 grace period in seconds
#NFSD_V4_GRACE=90
#
#
#
# Optional arguments passed to rpc.mountd. See rpc.mountd(8)
#RPCMOUNTDOPTS=""
# Port rpc.mountd should listen on.
MOUNTD_PORT=892
#
#
# Optional arguments passed to rpc.statd. See rpc.statd(8)
#STATDARG=""
# Port rpc.statd should listen on.
STATD_PORT=662
# Outgoing port statd should used. The default is port
# is random
STATD_OUTGOING_PORT=2020
# Specify callout program
#STATD_HA_CALLOUT="/usr/local/bin/foo"
#
#
# Optional arguments passed to rpc.idmapd. See rpc.idmapd(8)
#RPCIDMAPDARGS=""
#
# Set to turn on Secure NFS mounts.
#SECURE_NFS="yes"
# Optional arguments passed to rpc.gssd. See rpc.gssd(8)
#RPCGSSDARGS=""
# Optional arguments passed to rpc.svcgssd. See rpc.svcgssd(8)
#RPCSVCGSSDARGS=""
#
# To enable RDMA support on the server by setting this to
# the port the server should listen on
#RDMA_PORT=20049
- Save your changes and exit the text editor.
- Restart the rpcbind service.
service rpcbind restart - Restart the NFS service.
service nfs restart
Open the Firewall
Your clients won’t be able to access the export we just created if the firewall is blocking them, which would be done by default. There are a few ways we can accomplish this, each depending on how the server was installed. If you have the System Config Firewall utility installed (system-config-firewall-tui), you can open up access using a simple GUI. Otherwise, you can use IPTables directly and create your own policy.
Use System Config Firewall to Allow Access
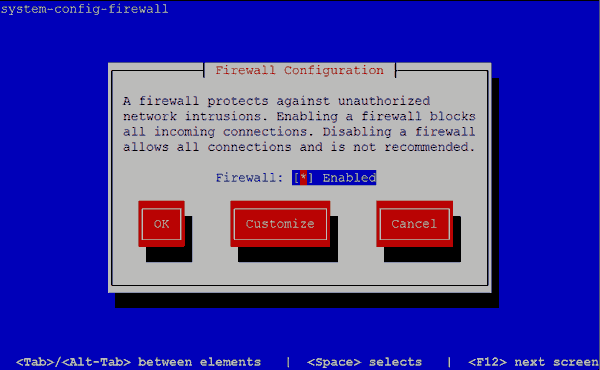
- Run System Config Firewall
system-config-firewall-tui - Ensure the Firewall is enabled.
System Config Firewall - Navigate to Customize by pressing Tab, and then press Enter.
- Scroll down the list of trusted services, and select NFS4.

System Config Firewall – Trusted Services - Navigate to the Forward button by pressing tab, and then press Enter.
- Add the following ports, for both TCP and UDP.
- 111
- 32703
- 32769
- 892
- 875
- 662
- 2020
- Navigate to the Close button by pressing tab, and then press Enter.
- Navigate to the OK button by pressing tab, and then press Enter.
- Your settings will be applied and access will be open to incomg NFS requests.
Configure Firewall Using IPTables Directly
Although System Config Firewall is a
- Open the IPTables policies configuration file into a text editor.
nano/etc/sysconfig/iptables - Add the following highlighted lines to it
:INPUT ACCEPT [0:0]
:FORWARD ACCEPT [0:0]
:OUTPUT ACCEPT [0:0]
-A INPUT -m state --state ESTABLISHED,RELATED -j ACCEPT
-A INPUT -p icmp -j ACCEPT
-A INPUT -i lo -j ACCEPT
-A INPUT -m state --state NEW -m tcp -p tcp --dport 22 -j ACCEPT
-A INPUT -m state --state NEW -m tcp -p tcp --dport 2049 -j ACCEPT
-A INPUT -m state --state NEW -m tcp -p tcp --dport 111 -j ACCEPT
-A INPUT -m state --state NEW -m udp -p udp --dport 111 -j ACCEPT
-A INPUT -m state --state NEW -m tcp -p tcp --dport 32803 -j ACCEPT
-A INPUT -m state --state NEW -m udp -p udp --dport 32803 -j ACCEPT
-A INPUT -m state --state NEW -m tcp -p tcp --dport 32769 -j ACCEPT
-A INPUT -m state --state NEW -m udp -p udp --dport 32769 -j ACCEPT
-A INPUT -m state --state NEW -m tcp -p tcp --dport 892 -j ACCEPT
-A INPUT -m state --state NEW -m udp -p udp --dport 892 -j ACCEPT
-A INPUT -m state --state NEW -m tcp -p tcp --dport 875 -j ACCEPT
-A INPUT -m state --state NEW -m udp -p udp --dport 875 -j ACCEPT
-A INPUT -m state --state NEW -m tcp -p tcp --dport 662 -j ACCEPT
-A INPUT -m state --state NEW -m udp -p udp --dport 662 -j ACCEPT
-A INPUT -m state --state NEW -m tcp -p tcp --dport 2020 -j ACCEPT
-A INPUT -m state --state NEW -m udp -p udp --dport 2020 -j ACCEPT
-A INPUT -j REJECT --reject-with icmp-host-prohibited
-A FORWARD -j REJECT --reject-with icmp-host-prohibited
COMMIT
- Restart IPtables to apply the new rules.
service iptables restart
Mount NFS Exports on Client
Temporary Mount
If the export is only needed temporarily to quickly access a file, you can use the mount command to mount the NFS export. This method will not survive a reboot.
- Log onto the client computer.
- Verify that the NFS export from the server is visible.
showmount <ip or hostname of nfs server> --exports - The output of the showmount command will list visible exports. In this example, the NFS server’s IP address is 172.30.1.213.
Export list for 172.30.1.213:
/exports/dept *
- Make a directory to mount the export into.
mkdir /dept - Mount the export.
mount -t nfs 172.30.1.213:/exports/nfs /dept
Persistent Mount using fstab
If the export needs to always be avaiable, you can configure fstab to mount the export at boot.
- Log onto the client computer.
- Verify that the NFS export from the server is visible.
showmount <ip or hostname of nfs server> --exports - The output of the showmount command will list visible exports. In this example, the NFS server’s IP address is 172.30.1.213.
Export list for 172.30.1.213:
/exports/dept *
- Make a directory to mount the export into.
mkdir /dept - Open fstab configuration file into a text editor.
nano /etc/fstab - Add the following line:
172.30.1.213:/exports/nfs /dept nfs defaults 0 0
- Save your changes and exit the text editor.
- Mount the NFS export.
mount -a


