Overview
MySQL is one of the most popular database server’s available and it’s free. It is also very simple to do quick installation for small websites which, aside from being free, is another reason it used by so many.
The problem with software that is so easy to deploy is a lot of times security takes a back seat. The goal of this tutorial is to not only deploy MySQL Server, but to ensure it is done securely. We want to ensure no one is using the Root account, and they all users have their own account with only the privileges they need. We also want to ensure each application has its own account, too.
Install and Configure MySQL Server
- Install MySQL Server
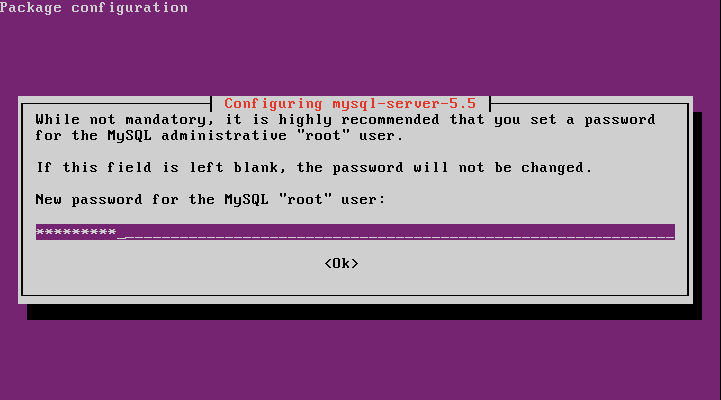
sudo apt-get install mysql-server
- When prompted, set Root’s password.
- Run the secure installation scripts to set Root’s password, disable remote logins for Root, remove anonymous user account, and remove testing databases.
sudo mysql_secure_installation
- When prompted change Root’s password, enter ‘n’.
- Accept all remaining defaults.
Create Database Admin Accounts
Every single administrator of the database server should have their own account. And they should only have the required privileges to the databases they are administratering. No one should ever use the Root account for day-to-day activities.
We’re creating a super user account for the administrator. This account, like Root, should not be used for day-to-day database queries and other common tasks. It should be used to maintain the server.
- Log into MySQL using its Root account – not confuse this with Ubuntu’s Root account.
mysql -u root -p
TABLE1 – mysql cli options for user logon -u User name to log into MySQL with. -p Signal to MySQL to prompt for a password, if the user has one (which they should!). If the user has a password and you do not use this option, the login will fail. - Create a user account for the database server’s administrator.
CREATE USER 'jsmith'@'localhost' IDENTIFIED BY 'enter-complex-password';
- Grant administrative privileges to the account.
GRANT ALL ON *.* TO 'jsmith'@'localhost' WITH GRANT OPTION;
- Flush the current privileges table to load an update one, granting jsmith the privileges we just assigned.
FLUSH PRIVILEGES;
- Log out of MySQL.
quit
Rename MySQL’s Root Account
Half the battle of brute forcing into an account is knowing its name. And what account is known by virtually everyone? Root. Let’s add a layer of obfiscated security to block most would-be attackers.
- Log into MySQL using your Admin account. Remember, DO NOT use Root.
mysql -u jsmith -p
- Change Root’s login name.
RENAME USER 'root'@'localhost' TO 'new_root_name'@'localhost';
- Flush the privileges table to apply our change.
FLUSH PRIVILEGES;
Create a New Database
We’re going to create a sample database for a web application. This will be needed later when we start creating accounts for our application database admins and our application service accounts. The scope of this tutorial niether covers choosing the best database engine for your application, nor how to optimize the chosen one.
- Log into MySQL with your MySQL Admin account.
mysql -u jsmith -p
- Create a new database, using default settings.
CREATE DATABASE myapp;
Create a Database User Account
We’re going to create an administrator account for our new database. This account will only need privileges to the database and its tables. It should not be able to anything to the MySQL server, such as creating user account or granting them rights, for example.
- Create the user account.
CREATE USER 'jdoe'@'localhost' IDENTIFIED BY 'enter-complex-password';
- We just created a user account for the local server. Depending on your environment, you probably do not want this. To allow the user access only from their desktop using a MySQL client, for example, create the user so it only has rights to log in from there. We’re going to use the desktop’s fully qualified domain name. You can, however, also use an IP address.
CREATE USER 'jdoe'@'jdoes-desktop.serverlab.intra' IDENTIFIED BY 'enter-complex-password";
- Grant the appropriate permissions to the account.
GRANT SELECT,INSERT,UPDATE,DELETE,INDEX,CREATE,ALTER,DROP ON myapp.* TO 'jdoe'@'localhost';
- Flush the privileges table to apply our new privileges.
FLUSH PRIVILEGES;
For a complete list of privileges, see MySQL’s documentation.
Create an Application Service Account
Every application should have its own account to connect to the database. Following the principal of least privileges, the account should only be able to access the databases and tables it needs to work with. It should also be restricted to only the rights it needs to the databases and tables.
These accounts should always have extremely complex passwords. A good practice is to use one that is, for example, 32 characters long with random asortment of alpha, numeric, and special characters. There should also be a mix of uppercase and lower case.
- Create a service account for your application.
Application is on the local serverCREATE USER 'myapp_srv'@'localhost' IDENTIFIED BY 'super-complex-password-here';
Application is on separate server (Recommended)
CREATE USER 'myapp_srv'@'appserver01.serverlab.intra' IDENTIFIED BY 'super-complex-password-here';
- Grant the service account appropriate rights to the application database.
GRANT SELECT,INSERT,UPDATE,DELETE ON myapp.* TO 'myapp_srv'@'localhost';
- Flush the privileges table to apply our new permissions.
FLUSH PRIVILEGES;
Conclusion
You now have a fairly secure MySQL installation. Our areas you should be concerned about, when the times comes, is performance and database engine optimizations. Each of these topics is a lengthy conversation, which I hope to cover in future tutorials.


